Every number on every can is a starting point — not a promise. Here’s what ten years in the booth taught me that the label never will.
A customer once came back to my shop furious. He’d picked up his freshly painted bumper, driven straight into a car wash, and destroyed a job that took me four hours to perfect. He pointed at the can and said: “It says one-hour dry time right here.
He wasn’t wrong. The can did say that. But “dry” on a rattle can and “ready” are two completely different things — and nobody bothers to explain where one ends and the other begins. That gap in understanding costs people money every single day. This guide is what I hand out to anyone who asks me about spray paint drying. Read it once. You won’t make that mistake again.”
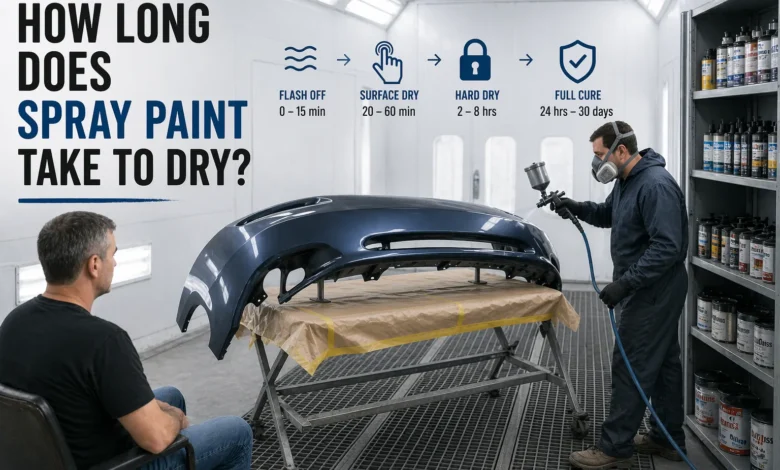
The 4 Stages of Spray Paint Drying
Every automotive paint goes through four distinct stages before it’s truly done. Most guides lump them all together as “drying” — which is exactly how panels get ruined. Knowing which stage you’re in tells you exactly what you can and cannot do to your car.
| 1 | 2 |
|---|---|
| Flash Off | Surface Dry |
| 0 – 15 min | 20 – 60 min |
| Solvents begin leaving the surface. Paint goes from glossy-wet to a dull tack. This is your recoat window. Do NOT touch. Do NOT fan directly. | Skin forms on the top. Feels dry to a light fingertip. Underneath is still soft. Dust will now stick. Handling will leave fingerprints permanently. |
| 3 | 4 |
|---|---|
| Hard Dry | Full Cure |
| 2 – 8 hrs | 24 hrs – 30 days |
| Safe to move the panel. Won’t dent on light contact. Still not buffable, sandable, or washable. Most cans claim “dry” here — misleading. | Chemical crosslinking complete. Paint reaches full hardness, chemical resistance, and gloss potential. Now you can compound, wax, and wash. |
⚠ Critical Mistake
Most DIYers confuse Stage 2 (surface dry) with Stage 4 (full cure). The paint feels dry — it’s not. Taking a car through an automatic car wash at Stage 3 is one of the fastest ways to ruin a fresh paint job.
Dry Times by Automotive Paint Type
The type of paint matters more than almost any other variable. Here’s how the main automotive spray paint types compare, with times measured at ideal shop conditions — 21°C (70°F) and 50% relative humidity.
| Paint Type | Surface Dry | Recoat Window | Hard Dry | Full Cure |
|---|---|---|---|---|
| Aerosol Lacquer | 5–10 min | 10–30 min | 1–2 hrs | 24–48 hrs |
| Rattle Can Enamel | 20–30 min | 15 min OR 1+ hr | 2–4 hrs | 5–7 days |
| Acrylic Urethane (2K) | 15–20 min | 30 min between coats | 4–6 hrs | 7–14 days |
| Basecoat/Clearcoat | 10–15 min | 10–20 min (base) | 2–4 hrs | 14–30 days |
| Enamel (Spray Gun) | 30–60 min | After full dry only | 8–24 hrs | Up to 30 days |
✓ Pro Insight
2K aerosol sprays (two-component cans with a separate hardener pin at the bottom) cure chemically, not just by evaporation. Once activated, the clock is ticking — the can is useless within 24–48 hours. But the result is a hard, professional-grade film that standard aerosols can’t match on body panels.
The Recoat Window Trap (What Kills Most Panel Jobs)
This is the mistake I see most often — even from guys with years of experience. Every paint type has what I call a recoat danger zone: a period after initial application where adding another coat will actively cause damage.
Enamel is the worst offender. The instructions say something like: “recoat within 15 minutes OR after 2 hours.” That is not a suggestion. That is a law.
If you spray coat two at the 45-minute mark on enamel, the solvents in the new coat attack the half-cured layer beneath — and you get lifting, wrinkling, and a panel you have to strip to bare metal.
— Learned the hard way, twice, early in my career
Understanding Flash Time vs. Recoat Time
Flash time is the minimum time needed for solvents to escape the surface before the next coat. It’s measured in minutes, not hours. Recoat time is how long you wait before applying an additional full coat without risk. These are not the same number.
| Paint Type | Flash Time | Safe Recoat (Wet-on-Wet) | Safe Recoat (Full Dry) |
|---|---|---|---|
| Lacquer Aerosol | 5 – 8 min | 10 – 20 min | After 1 hr |
| Solvent Basecoat | 10 – 15 min | 15 – 25 min (until matte tack) | After full cure only |
| Rattle Can Enamel | 10 – 15 min | Within 15 min ONLY | After 2+ hrs |
| 2K Urethane | 15 – 20 min | 20 – 30 min | Follow TDS sheet |
| Clearcoat over Base | When base looks matte | 15 – 20 min between clears | Do not recoat clear once cured |
You might also like: Car Exterior Care
Environment: The Variable Nobody Controls Enough
You can have the best paint money can buy and destroy the job with wrong conditions. In my shop, I invested in a proper thermometer and humidity gauge before I bought my HVLP gun. That’s how much environment matters.
🌡️ Temperature
| Ideal Range | 60 – 80°F (16 – 27°C) |
| Too Cold (below) | < 55°F (13°C) |
| Too Hot (above) | 90°F (32°C) |
| What cold does | Stalls cure, adhesion fails |
| What heat does | Surface skins before flow = orange peel |
💧 Humidity
| Ideal Range | 40 – 55% RH |
| Too High (above) | 65% RH |
| Too Low (below) | < 30% RH |
| High humidity effect | Blushing, dull finish, fish eyes |
| Low humidity effect | Dry spray, poor leveling |
💨 Airflow
| Ideal | Steady, low-velocity cross-draft |
| No airflow | Solvent vapors settle back on wet paint |
| Too much wind | Dust contamination, dry spray |
| Direct fan on wet paint | Surface cools below dew point → blushing |
🌞 Sunlight / UV
| Direct sun (hot panel) | Blistering, uneven cure |
| UV for curing | Helpful after hard dry |
| Indirect shade | Best for application |
| Surface temp limit | Max ~85°F panel surface |
🛠️ Pro Tip from The Booth
Always check the panel surface temperature — not just the air temperature. On a 70°F day with direct sun, a dark metal panel can reach 110°F+. That’s well outside the paintable range. I use a cheap infrared thermometer gun on every panel before I shoot. £15 tool that saved me hundreds in respray costs.
How the Substrate Changes Everything
Most spray paint articles treat all surfaces the same. In automotive body work, that’s a critical oversight. Whether you’re spraying bare metal, a plastic bumper, or a body filler repair dictates not just how long it takes — but how you prepare and which paint you reach for.
🔩 Bare Metal
Non-porous. Solvents can’t absorb in — they can only evaporate upward. Needs etching primer first for adhesion. Prone to “mapping” (old repair outlines showing through).
Flash: 15–20 min
Cure: Longest
🚗 Plastic Bumper
Requires flex additive. Dries faster to the touch but is softer longer — flex additives slow full cure. Never use solvent-heavy lacquers without plastic primer. Will crack when flexed if cured wrong.
Touch dry: 30–45 min
Flex cure: 48+ hrs
🔲 Body Filler / Primer
The most misunderstood substrate. Polyester filler continues to off-gas even after sanding. Topcoat over under-cured filler causes “filler sinkage” — visible dips appear weeks later. Wait 24 hrs minimum.
Filler dry: 20 min
Ready for topcoat: 24 hrs
Defects Caused by Getting the Timing Wrong
This is the section that separates professionals from enthusiastic amateurs. Every one of these defects is directly caused by incorrect dry time management — either rushing, or missing a window entirely.
| Defect | What It Looks Like | Timing Cause | Fix |
|---|---|---|---|
| Solvent Pop | Tiny bubble craters across the surface, like a dormant volcano mouth | Recoated too fast; solvents trapped and burst through | Sand, re-seal, refinish. Severe = strip to metal |
| Lifting / Wrinkling | Surface shrivels and bubbles up in the recoat area | New solvents attack partially cured enamel layer (recoat danger zone) | Strip affected area; can’t be sanded out |
| Orange Peel | Bumpy texture resembling citrus skin | Paint dried too fast before flow-out (heat, fast reducer, too far gun distance) | Wet sand 1500–2000 grit then compound and polish |
| Blushing / Haze | Milky, dull finish instead of gloss — especially on lacquer | High humidity; moisture trapped during fast solvent evaporation — surface cools below dew point | Light coat of retarder thinner; or re-shoot in better conditions |
| Filler Sinkage | Wavy low spots appear weeks after job completion | Topcoat over filler that wasn’t fully cured — filler continued shrinking | Wait 24–48 hrs on filler before any topcoat. Prevention only. |
| Dry Spray | Rough, sandy texture in a confined area | Overspray landing on already-drying surface; gun too far away; conditions too hot and dry | Wet sand with 1200 grit, compound, polish if minor |
Professional Force-Drying: The IR Lamp Method
In a production shop, time is money. We don’t always have the luxury of waiting for ambient conditions. That’s where infrared curing lamps change the game — and most hobbyist guides never mention them.
An IR lamp works by heating the panel from the surface inward, accelerating solvent evaporation and the chemical crosslinking of 2K paints. In my shop, we can reduce a 4-hour cure window to 45 minutes with the right IR setup.
IR Lamp Protocol (Shop Standard)
- Flash naturally first. Always let paint flash off for the manufacturer’s stated time before applying IR heat. Rushing this step causes solvent pop — the heat traps solvents before they escape.
- Distance matters. Typically, 50–80cm from panel surface. Too close = blistering. Always check the surface temp during cure — target 60–70°C (140–158°F) on the panel, not in the air.
- Move the lamp. For large panels, move the lamp slowly to avoid hot spots. Curved panels need angle adjustment — IR is line-of-sight.
- Cool before handling. Let the panel return to ambient temp before touching, masking, or reassembling. Hot freshly-cured paint is deceptively soft.
⚡ DIY Force-Dry Without a Lamp
No IR lamp? A heat gun on lowest setting held 30–40cm from the surface can accelerate drying in a pinch — but only after proper flash time. Move it constantly. Never stop moving. One stationary second too long and you’ll blister the panel. I’ve seen it happen to people who should know better.
Post-Paint Care: The Timeline After the Gun Goes Down
Getting the dry time right is only half the equation. What you do — and don’t do — in the weeks after painting determines whether that job lasts two years or ten.
You might also like: Top Advantages and Disadvantages of Ceramic Coating
| 1 | >>>0 – 24 HOURS >>Hard Dry Stage — Handle with Extreme Care >No touching. No washing. No covers (car covers abrade soft paint). Keep out of direct sun and away from contaminants. Dust is your worst enemy right now — it embeds permanently. |
| 2 | >>>24 – 72 HOURS >>Safe to Move. Still Very Soft. >Can be driven carefully. No car wash — especially not automatic. Rain exposure at this stage is damaging on enamel; less damaging on 2K urethane. Still no waxing or polish. |
| 3 | >>>7 – 14 DAYS >>Hand Wash Only — Very Gentle >Use a pH-neutral shampoo and a soft microfibre mitt. No pressure washer. No touchless car wash (the chemicals are too aggressive). Pat dry — don’t drag a towel. |
| 4 | >>>30 DAYS >>Compounding & Light Polishing Window >Most urethane systems reach full cure at 30 days. Now you can compound out any light orange peel, polish, and apply a light wax or paint sealant. |
| 5 | >>>60 – 90 DAYS >>Ceramic Coating / Wax / Full Protection >Paint has now fully “outgassed.” It’s safe to apply ceramic coatings, hard waxes, or paint protection film. Before 60 days, these can trap residual solvents and cause adhesion failures. |
Quick Reference: Real-World Dry Times at a Glance
Below is a consolidated cheat sheet based on real shop conditions — not manufacturer ideal-world figures. These numbers assume 65–75°F (18–24°C), 45–55% relative humidity, and good ventilation.
| Scenario | Touch Safe | Drive Safe | Wash Safe | Wax Safe |
| Rattle Can Touch-Up Spot | 30–60 min | 2–3 hrs | 7 days | 30 days |
| Rattle Can Panel Respray | 1 hr | 4–6 hrs | 10–14 days | 30 days |
| 2K Aerosol (e.g., Spraymax) | 30 min | 3–4 hrs | 7 days | 14–21 days |
| Pro Basecoat + Clearcoat | Clear: 2 hrs | 24 hrs | 14 days | 30–60 days |
| Pro 2K Urethane Single Stage | 4 hrs | 24 hrs | 14 days | 30 days |
| Full Respray with IR Cure (shop) | 45 min | Same day | 5–7 days | 21–30 days |
The Bottom Line from the Booth
After ten years of body finishing, the single most expensive mistake I’ve seen — more than bad prep, more than cheap paint — is impatience. Specifically, not understanding the difference between the four stages of drying, or walking into the recoat danger zone because you didn’t read the label carefully enough.
The dry time printed on a can is the manufacturer’s best-case, ideal-conditions number. Your garage in winter is not ideal conditions. Your driveway in July heat is not ideal conditions. Your humidity level right now is probably not 50%.
Respect the process. Flash properly. Stay out of the recoat danger zone. Check your panel temperature, not just the air. And never — ever — run a fresh paint job through an automatic car wash before 14 days. That job doesn’t come back. You start over.
Get those fundamentals right and spray paint is incredibly forgiving. Ignore them and the most expensive rattle can in the world won’t save you.
*THIS ARTICLE WRITTEN FROM DIRECT SHOP EXPERIENCE · BODY PANEL PREP, HVLP SPRAY, COMPOUND & POLISH · ALL TIMES BASED ON 21°C / 70°F, 45–55% RH STANDARD CONDITIONS UNLESS NOTED.