A Field-Tested Guide from 5 Years Inside the Shop
The Moment That Changed How I Think About Transmission Fluid
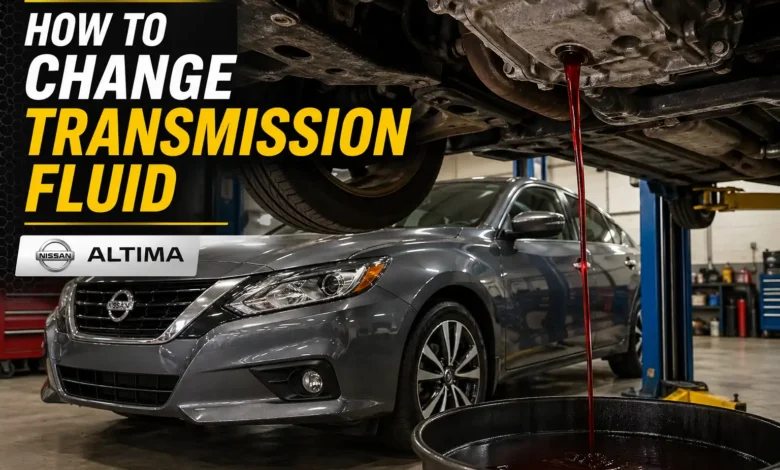
Three years into working the shop floor, a customer rolled in a 2016 Nissan Altima that had been shuddering for six months. The owner had been told by two different shops that his transmission was dying — $3,800 rebuild, no negotiation. I pulled the dipstick. The fluid was black. Not dark red. Not brown. Black. I changed the fluid on the spot — $85 in materials, 45 minutes of labor. He drove away smooth. That car is still running today.
That story doesn’t mean a fluid change will always save a transmission. But it taught me that most people — and frankly, most generic guides online — don’t take transmission fluid seriously until something already sounds wrong. By then, they’re usually Googling from a parking lot.
This guide goes beyond the standard “drop the pan, add fluid” tutorial. I’m going to tell you the things that get glossed over: why the temperature of the fluid during draining matters, the math behind how much old fluid actually leaves during a pan-drop, what your pan magnet is telling you, and why your torque wrench is more important here than on your lug nuts.
Step 0: Know Your Transmission Type Before You Touch Anything
This is the step most guides skip entirely — and it’s the one that determines everything else. Before buying fluid, before lifting the car, before doing anything, you need to know exactly what type of transmission you have. Getting this wrong doesn’t just mean wasted effort. It can destroy a transmission within 1,000 miles.
| Transmission Type | Fluid Required | Change Interval | Pan-Drop Possible? |
|---|---|---|---|
| Automatic (Traditional) | ATF (Dexron VI, Mercon V, ATF+4, etc.) | 30,000–60,000 miles | Yes |
| CVT (Continuously Variable) | CVT-specific fluid ONLY | 30,000–40,000 miles | Yes, but tricky |
| Manual (MT) | Gear Oil (75W-90) or MTF | 30,000–60,000 miles | Drain plug only |
| DCT (Dual-Clutch) | DCT-specific fluid | 40,000–60,000 miles | Partially, varies by model |
| “Lifetime” Sealed Auto | OEM-specific ATF | Every 60,000–80,000 miles* | Requires adapter kit |
Pro Tip: To find your exact transmission type and OEM fluid code: open your driver’s door jamb sticker, check the owner’s manual under ‘Fluids and Lubricants,’ or run your VIN through an OEM parts site. Never rely on a generic fluid recommendation from a forum.
How to Identify Your Transmission Type Without the Manual
- Look for a dipstick: Automatics usually have one (red/orange handle). CVTs and sealed transmissions typically don’t.
- Check for a fill plug on the side of the transmission casing: Manual transmissions and some DCTs use this system.
- Look at the shifter: If it has a full PRNDL (Park/Reverse/Neutral/Drive/Low), it’s automatic. If it has gear numbers with no Park, it’s manual.
- CVT giveaway: If your car accelerates without any noticeable gear shifts and sounds like it’s always searching for the right RPM, it’s likely a CVT.
Tools and Materials: The Complete List
Most guides list the basics. Here is the actual list — including what prevents problems at 2 AM with a leaking pan.
| Item | Purpose | Notes |
|---|---|---|
| Correct ATF/CVT/MTF fluid | Replacement fluid | Buy 1 extra quart than spec says — always |
| Transmission filter kit | New filter + gasket | Includes pan gasket; most kits are model-specific |
| Drain pan (min. 2-gallon) | Catch old fluid | Wider is better — ATF splashes more than oil |
| Torque wrench (ft-lbs) | Pan bolt tightening | CRITICAL — do not skip. 12–15 ft-lbs is typical |
| Fluid transfer pump / funnel with long hose | Adding new fluid | Most dipstick tubes need a 24″+ hose to reach |
| Brake cleaner spray | Cleaning the pan | Do NOT use carburetor cleaner — it leaves residue |
| Clean lint-free rags | Gasket surface prep | Paper towels leave fibers; use shop towels |
| Plastic scraper | Old gasket removal | Metal scrapers scratch sealing surfaces |
| Penetrating oil (PB Blaster) | Stuck drain plug | Apply 10 minutes before breaking loose |
| Nitrile gloves (2 pairs) | ATF is a skin irritant | Long-term skin exposure linked to dermatitis |
| Floor jack + 2 jack stands | Vehicle lift | Never work under a car on a jack alone |
| Magnetic parts tray | Hold pan bolts | 12–14 bolts means 12–14 chances to lose one |
CRITICAL: Never use a scissor jack for under-car work. It is rated for tire changes only — not sustained support while you’re beneath the vehicle. Always use jack stands rated for your vehicle’s weight.
The Fluid Temperature Window
Every guide tells you to warm up the engine before draining. None of them tell you why the temperature window is specific — or what happens when you get it wrong.
Transmission fluid needs to be warm (around 150–180°F / 65–82°C) for the following reasons:
- Warm fluid flows faster and carries more suspended debris out with it during the drain.
- Cold fluid is thicker and leaves up to 20% more old fluid behind in the pan and passages.
- Hot fluid (over 200°F / 93°C) is dangerous to drain — it can cause burns even through gloves.
The sweet spot: Drive the car for 10–15 minutes (normal city driving, not highway). Then let it sit for 20–30 minutes before draining. This keeps fluid warm enough to flow freely, but not hot enough to burn you when it splashes.
Pro Tip: In cold climates (below 40°F / 4°C), extend the warm-up drive to 20 minutes. The transmission runs cooler in low ambient temps and the fluid thickens faster once the car is off. I’ve seen incomplete drains in winter cause ‘mixing’ problems where old and new fluid don’t behave the same way.
Step-by-Step: How to Change Automatic Transmission Fluid (Pan Drop Method)
Step 1 — Check Fluid Condition Before You Start
Pull the dipstick. Wipe it on a white paper towel. This gives you a baseline:
| Fluid Color | Smell | What It Means |
|---|---|---|
| Bright red / pink | Petroleum / sweet | Healthy — change is preventive |
| Dark red / burgundy | Mild oil smell | Due for a change — normal wear |
| Brown | Slightly burnt | Overdue — change immediately |
| Black | Burnt / acrid | Critical — may have internal damage |
| Milky / frothy pink | Sweet + unusual | Water contamination — stop, inspect cooler |
Step 2 — Lift and Support the Vehicle
- Place wheel chocks behind the rear tires.
- Position floor jack under manufacturer-specified lift points (see owner’s manual).
- Raise vehicle and place jack stands under the frame rails — not the rocker panels.
- Gently rock the car before going under. If it moves, it’s not secure.
Step 3 — Locate the Transmission Pan
On front-wheel-drive vehicles, the transmission is typically on the driver’s or passenger’s side of the engine bay, with the pan underneath. On rear-wheel-drive vehicles, the pan is further back toward the center of the car, below the floor console area.
Place your drain pan underneath, offset slightly toward the side you’ll be loosening first — fluid will pour toward that side as the pan tilts.
Step 4 — Loosen Pan Bolts in the Correct Sequence
This is where most DIYers make their first mistake. Do NOT remove all bolts evenly. Here is the correct method:
- Identify the bolt farthest from you — this is your “anchor” side.
- Remove all bolts EXCEPT the two anchor bolts closest to the far corner.
- Loosen (but don’t remove) those two anchor bolts until the pan is tilted and fluid begins draining into your catch pan.
- Once most fluid has drained from the tilted side, remove the anchor bolts and lower the pan carefully.
Pro Tip: The tilt-and-drain method prevents the “fluid avalanche” that happens when you pull the last bolt and 4–6 quarts of ATF hit you in the face and cover your floor. I’ve seen this end more than one DIY project permanently.
Step 5 — Inspect the Pan Magnet
Almost all automatic transmission pans have a magnetic drain plug or an internal magnet affixed to the pan floor. This is one of the most diagnostic steps of the entire job — and almost no guide explains what you’re actually looking at.
| What You See on the Magnet | What It Means | Action Required |
|---|---|---|
| Fine gray metallic fuzz (soft, like velvet) | Normal friction material wear | Proceed with service |
| Small, shiny metal particles (1–2mm) | Slightly elevated wear — watch it | Note mileage; recheck at next change |
| Chunky metal pieces or sharp flakes | Active gear or clutch damage | Stop — get a professional diagnosis before driving |
| No debris at all | Either recently serviced or very new unit | Normal — proceed |
| Brass/copper colored particles | Bushing or thrust washer wear | Investigate with a professional soon |
Clean the magnet with brake cleaner and a lint-free cloth before reinstalling the pan. A clean magnet on the next change gives you accurate comparison data.
Step 6 — Replace the Filter
The transmission filter sits inside the pan, held by 2–3 bolts or a simple push-fit depending on your vehicle. Remove it carefully — it still contains fluid.
- Note the orientation of the old filter before removing it. Some are directional.
- Check that the old O-ring comes out with the filter. If it stays behind and you install the new one on top, you will have two O-rings — which causes a serious leak.
- Install the new filter with the O-ring fully seated. Do not use sealant on the O-ring.
Step 7 — Clean the Gasket Surfaces
This step, done wrong, causes more post-service leaks than any other. Here is the correct process:
- Use a plastic scraper to remove all old gasket material from both the pan edge and the transmission housing mating surface.
- Spray brake cleaner on a lint-free shop towel and wipe both surfaces until the towel comes away clean.
- Run your fingernail across the surface. If you feel any raised gasket material, keep scraping.
- Inspect for cracks, warping, or scored surfaces on the pan. A warped pan (from overtightening) will never seal properly without straightening or replacing.
DO NOT: Apply silicone gasket sealer or RTV to transmission pan gaskets unless your service manual specifically calls for it. Most rubber gaskets are designed to seal dry. Sealant can squeeze inside the transmission and contaminate the fluid or block passages.
Step 8 — Install New Gasket and Pan
- Position the new gasket on the cleaned pan. Use a tiny dab of petroleum jelly (NOT silicone) at the corners to hold it in place while you lift the pan.
- Lift the pan into position and start all bolts finger-tight before torquing any of them.
- Torque bolts in a star/crosshatch pattern — never circle the pan. This ensures even gasket compression.
| Vehicle Type / Pan Size | Typical Torque Spec | Thread Size |
|---|---|---|
| Most GM vehicles (Dexron) | 12–15 ft-lbs (16–20 Nm) | M8 or 5/16″ |
| Ford (Mercon) | 8–11 ft-lbs (11–15 Nm) | M8 |
| Chrysler / Stellantis (ATF+4) | 14 ft-lbs (19 Nm) | M8 |
| Honda / Acura | 9 ft-lbs (12 Nm) | M6 |
| Toyota / Lexus | 48 in-lbs / 4 ft-lbs (5.4 Nm) | M6 |
These are general benchmarks — ALWAYS verify against your specific service manual. A torque spec that’s 20% off either direction causes problems: undertightening = leak; overtightening = warped pan, stripped threads, or cracked gasket.
Pro Tip: After torquing, go around a second time in the same star pattern at the same spec. Pan bolts can relax slightly during the initial pass. This second pass is what separates a professional job from one that leaks within 500 miles.
Step 9 — Add New Fluid
Lower the vehicle. Add the correct fluid through the dipstick tube using a pump or funnel with a long flexible hose. Here’s where you need to understand the math:
The 40-60% Reality of a Pan-Drop Fluid Change
A typical automatic transmission holds 9–13 quarts of ATF total. A pan-drop only removes fluid from the pan — not from the torque converter, cooler lines, or valve body. Here’s the math on a 10-quart system:
- Total fluid in system: 10 quarts
- Fluid in pan (drained): 4–5 quarts
- Fluid remaining in torque converter + lines: 5–6 quarts
- Actual old fluid replaced: 40–50%
This is why a second drain-and-fill 1,000 miles later gets your total fluid renewal up to ~75%. And why shop flush machines (which pump through the cooler lines) achieve near 100%. A pan-drop is not a failure — it’s the correct DIY method — but know what it’s actually accomplishing.
Start the engine. Shift through all gears (P-R-N-D-L), pausing 3 seconds in each. Return to Park. Check dipstick with engine running. Add fluid in half-quart increments until the level hits the HOT FULL mark.
Manual Transmission Fluid Change: The Overlooked Procedure
Manual transmissions are rarely covered in these guides because they’re less common. But they fail just as quietly — and more expensively — when the fluid is neglected.
Key Differences vs. Automatic
- No pan — manual transmissions use a side-mounted fill plug and a bottom drain plug.
- Fluid is much thicker — gear oil (75W-90 GL-4 or GL-5) or a dedicated MTF, not ATF.
- No filter — the drain plug typically has a magnetic tip to catch wear particles.
- Fill from the side plug hole, not the top — the correct level is when fluid just starts to dribble out of the side fill hole.
Manual Transmission Fluid Change Steps
- Warm up the gearbox — drive 10 minutes before starting.
- Locate both plugs. Side plug (higher) = fill. Bottom plug = drain. Always loosen the FILL plug first — if it’s seized and you can’t open it after draining, you have no way to refill the transmission.
- Drain from the bottom. Clean the magnetic plug tip. Re-install with a new copper sealing washer.
- Pump new MTF in through the side fill hole using a fluid transfer pump until it starts to seep back out.
- Reinstall the fill plug. Torque to spec (typically 18–22 ft-lbs depending on thread size).
GL-5 vs GL-4: Using GL-5 fluid in a transmission designed for GL-4 can corrode yellow metal components (brass synchros, bronze shift forks). Always verify the specification — not just the viscosity. Most older Japanese manuals and many European gearboxes require GL-4.
CVT Fluid: Why It’s Not the Same Job
CVT fluid changes follow the same basic drain-and-fill principle, but there are specific pitfalls that cause expensive failures.
- CVT fluid is NOT interchangeable with regular ATF. Using ATF in a CVT will cause belt/chain slippage and internal damage within a few hundred miles.
- CVT fluid is viscosity-sensitive — overfilling causes belt slippage. Underfilling causes overheating. The correct level check requires the fluid to be at operating temperature (around 95–105°F / 35–40°C) — not cold.
- Nissan NS-3 and NS-2 fluids are NOT cross-compatible. Nissan changed the spec in 2016. Using NS-2 in a newer NS-3 transmission accelerates wear.
- Honda CVT fluid (HCF-2) is Honda-only — third-party equivalents exist but OEM is recommended for warranty considerations.
Pro Tip: For Nissan Rogue, Altima, and Sentra CVTs (some of the most failure-prone units on the road), I recommend changing fluid every 30,000 miles regardless of what the owner’s manual says. The service manual intervals were set in laboratory conditions — real-world stop-and-go driving in warm climates runs hotter and degrades the fluid faster.
The 500-Mile Post-Service Check
Almost no guide mentions this, and it’s the step that prevents most post-service failures from becoming permanent problems.
Exactly 500 miles after your fluid change, do the following
- Check fluid level cold and hot. A small amount of fluid loss in the first 500 miles can indicate a slow pan leak.
- Inspect the pan area visually for any seepage along the gasket edge.
- Check how the car shifts. Minor improvement is normal. Any new roughness, shuddering, or slipping should be investigated — it may indicate loosened debris from the service.
- Check the fluid color on the dipstick. It should still look like the fresh fluid you put in. If it’s already darkening, you may have significant contamination from old fluid mixing.
Troubleshooting: What to Do When Things Go Wrong Post-Service
| Symptom After Service | Most Likely Cause | Fix |
|---|---|---|
| Pan dripping / active leak | Undertorqued bolt or damaged gasket | Retorque to spec; replace gasket if needed |
| Rough or hard shifting | Wrong fluid type OR too-low level | Verify fluid spec; check level with engine running |
| Shuddering on acceleration | Wrong ATF spec or CVT overfill | Drain and refill with correct, correct-level fluid |
| Transmission slipping | Too low level OR old debris dislodged | Check level first; second drain-and-fill if debris |
| Burnt smell immediately after | Hot leak dripping on exhaust | Stop car immediately; find and fix the leak |
| Level drops within 200 miles | Slow seal leak or pan leak | Visual inspection; professional diagnosis if no visible source |
Cost Breakdown: DIY vs. Professional
| Service Type | DIY Cost | Professional Cost | What You Actually Get |
|---|---|---|---|
| Pan-drop fluid change (no filter) | $30–$70 | $120–$180 | ~40–50% fluid renewal |
| Pan-drop with filter replacement | $60–$130 | $150–$250 | ~40–50% fluid + new filter |
| Double drain-and-fill (DIY x2) | $90–$180 | N/A | ~70–75% fluid renewal |
| Full transmission flush (machine) | Shop only | $200–$350 | ~95–100% fluid renewal |
| CVT fluid change | $80–$160 | $200–$300 | ~40–50% with pan-drop |
| Manual trans fluid change | $30–$60 | $100–$150 | ~90% renewal (full drain) |
The Bottom Line, From the Shop Floor
Changing your transmission fluid is not a glamorous job. It’s messy, requires the right tools, and takes about 45–90 minutes done properly. But the alternative — a rebuilt or replaced transmission — starts at $1,800 and can exceed $5,000 on newer vehicles.
Here’s the short version of everything this guide covers:
- Identify your transmission type BEFORE buying fluid. Getting this wrong can cost you thousands.
- Warm the fluid before draining, but let it cool 20–30 minutes so you don’t get burned.
- Check the pan magnet — it’s the cheapest diagnostic tool you’ll ever use.
- Torque your pan bolts. Not finger-tight. Torque wrench, correct spec, star pattern.
- Understand you’re only changing 40–50% of the fluid with a pan-drop. A second service amplifies the results.
- Do the 500-mile post-service check. Always.
The transmission is one of the most expensive components in any vehicle. It communicates through the fluid it runs on. Learn to read it, and you’ll never be surprised by a bill that starts with four digits.
Disclaimer:
This article is based on professional shop experience and general automotive knowledge. Torque specifications, fluid types, and service intervals vary by vehicle. Always consult your vehicle-specific service manual before performing maintenance. Improper transmission service can void warranties and cause mechanical damage.